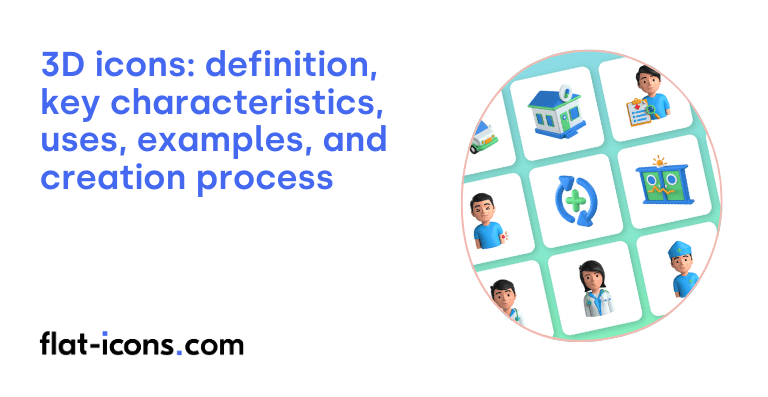
3D icons are digital icons designed to appear three-dimensional. They enhance user engagement and provide a more intuitive experience.
The key characteristics of 3D icons are specular highlights and shadows, dynamic response, advanced techniques, creation tools, and glossy appearance.
3D icons are typically used in web and mobile UI design, gaming interfaces, augmented and virtual reality, marketing materials, and geographic information systems (GIS).
Table of Contents
What are 3D icons?
3D icons are digital representations of objects or symbols that exhibit depth and volume. This visual effect, characteristic to this icon style, is created through the application of various techniques, including shading, highlights, shadows, and perspective, which together generate the illusion of three-dimensionality on a standard two-dimensional screen.
While these icons appear to possess volume, it’s important to note that the majority of 3D icons found in user interfaces employ a technique often referred to as “fake 3D.” This approach simulates a three-dimensional shape within the constraints of a 2D plane, providing a visual sense of depth without true three-dimensional geometry.
What are the key characteristics of 3D icons?

The key characteristics of 3D icons are listed below.
- Specular highlights and shadows: These visual cues are used to create the illusion of depth, providing icons with form and volume.
- Dynamic response: Modern 3D icons often include subtle movements, lighting changes, or transformations when interacted with, enhancing user interactivity.
- Advanced techniques: Techniques like parallax, reflections, and layered designs are employed to enhance the realism and visual appeal of 3D icons.
- Creation tools: Contemporary 3D icons are typically created using 3D rendering software, aligning with the design trends in AR, VR, and gamified interfaces.
- Glossy appearance: Historically, 3D icons, such as those in Windows Vista, were known for their glossy appearance, vibrant colors, and lifelike textures, reflecting a trend toward modernity.
Where are 3D icons typically used?
3D icons are typically used as listed below.
- Web and mobile UI design: Enhance engagement and interactivity by serving as navigation elements, interactive buttons, and visual representations of product features.
- Gaming interfaces: Contribute to a more immersive experience as buttons, interactive elements, and representations of in-game items.
- Augmented and virtual reality: Act as interactive hotspots or markers, aiding user navigation and interaction within virtual environments.
- Marketing materials: Capture audience attention and strengthen brand identity in presentations, social media posts, and other promotional content.
- Geographic information systems (GIS): Bring realism to maps by portraying traditional 2D map symbols in a three-dimensional context, aiding in data visualization.
When should you use 3D icons?
You should use 3D icons to create visually impressive and engaging user experiences, particularly in prominent areas like website hero sections or key application elements. They are especially suitable when a brand aims to project a cutting-edge or futuristic aesthetic.
Furthermore, 3D icons can be effective in simplifying complex information through visual data presentation, as seen in applications for fields like architecture or medicine. The creation of custom 3D elements can also significantly differentiate a brand and establish a memorable and unique visual identity. The illustrative power of 3D icons is particularly useful for tangibly representing real-world objects or even abstract concepts, thereby enhancing user understanding.
However, it’s essential to maintain a balanced approach, as the overuse of 3D icons can lead to a visually heavy and potentially distracting interface. The inherent flexibility of 3D styles allows them to be effectively integrated into various industries, including e-commerce, retail, and healthcare, depending on the specific rendering, textures, and level of detail chosen.
What are the pros and cons of using 3D icons?
The pros of using 3D icons are listed below.
- Enhanced engagement and intuitiveness: The depth and realism of 3D icons can capture user attention and make representations more easily understandable.
- Creative flexibility for branding: 3D icons offer a wide range of styles, animations, and typography options for unique, brand-aligned visuals.
- Convey innovation and modernity: Using 3D icons can give a contemporary feel, appealing to a tech-savvy audience.
The cons of using 3D icons are listed below.
- Potential performance and compatibility issues: 3D graphics can impact loading speed and responsiveness, and cross-platform compatibility can be challenging.
- Increased development complexity: Creating seamless 3D interfaces requires specialized skills in 3D modeling, rendering, and scripting.
- Risk of reduced usability: Overly complex or overwhelming 3D elements can negatively affect the user experience.
- Limitations in non-digital media: Translating 3D icons to print or other non-digital formats may require additional effort.
What are some examples of 3D icons?
Some examples of 3D icons are listed below.
- Realistic app icons: An app icon that looks like a physical object, such as a glossy phone, a textured notepad, or a metallic gear.
- Isometric illustrations: Icons depicted from an angled perspective, giving them a sense of depth and volume. For example, an isometric house or a stack of isometric books.
- Clay-style icons: Icons that have a soft, rounded appearance as if they were made of clay, often with subtle shadows and highlights.
- Glassmorphism icons: Icons that appear to be made of frosted glass, with a translucent effect, subtle borders, and light reflections.
- Neumorphism icons: Icons that blend into the background with subtle inner and outer shadows to create a soft, extruded or inset appearance.
- Detailed product icons: Icons of products that show their three-dimensional form with realistic textures and lighting, like a 3D rendering of headphones or a camera.
- Abstract 3D shapes: Icons that utilize basic 3D geometric shapes like cubes, spheres, and cylinders with interesting textures or gradients.
- Character icons: Small 3D renderings of characters or avatars with distinct features and expressions.
- Interface elements: 3D representations of buttons, toggles, or sliders that appear to have physical depth.
- Folder and file icons: Icons of folders or files that have a visible thickness and perhaps a slightly open flap for folders.
How do you create 3D icons?

You create 3D icons by following the step-by-step guide below.
- Understand the basics of 3D modeling: Before you start, familiarize yourself with fundamental 3D concepts like vertices, edges, faces, and depth. This will help you grasp the tools and techniques involved.
- Choose a 3D modeling software: There are various software options available for creating 3D models, including Blender (free and open-source), Cinema 4D, Autodesk Maya, 3ds Max, and SketchUp. Choose one that suits your skill level and budget.
- Plan your icon design: Just like with flat icons, it’s helpful to sketch out your idea or plan the shape and form of your 3D icon before diving into the software. Consider the perspective and the level of detail you want to achieve.
- Start with basic shapes: Most 3D modeling starts with primitive shapes like cubes, spheres, cylinders, and cones. Begin by adding these basic forms to your scene and then manipulate them to create the overall structure of your icon.
- Model the icon: Use the tools within your chosen software to sculpt, extrude, and otherwise modify the initial shapes into the desired form. This might involve adding more geometry, refining curves, and shaping the details of your icon.
- Add details and refinements: Once the basic shape is in place, you can start adding smaller details and refining the overall look. This could include adding bevels to edges, creating indentations, or adding smaller elements to enhance the icon’s visual appeal.
- Apply materials and textures: To make your 3D icon visually interesting, you’ll need to apply materials and textures to its surfaces. Materials define how light interacts with the object (e.g., shiny, matte, rough), while textures add surface detail like color patterns or bumps.
- Set up lighting: Lighting plays a crucial role in how your 3D icon looks. Experiment with different types of lights (e.g., point lights, spotlights, area lights) and their positions to create the desired highlights and shadows that give your icon depth and dimension.
- Position the camera: The camera in your 3D software determines the viewpoint from which your icon will be rendered. Position and orient the camera to get the best angle and framing for your icon.
- Render the icon: Rendering is the process of generating a 2D image from your 3D scene. Your software will calculate how light interacts with your model and produce a final image. Adjust render settings like resolution and quality as needed.
- Post-processing (optional): After rendering, you can further enhance your icon using image editing software like adobe photoshop or gimp. This might involve adjusting colors, adding subtle effects, or compositing the icon onto a background.
- Export your icon: Finally, export your rendered 3D icon in a suitable image format. Common formats include PNG (often used for icons due to its support for transparency) and jpeg. You might also consider exporting different angles or variations of your icon.
Read more icon articles
