Progressive JPEG images are very common on the internet today. But what is the exact difference between regular and progressive JPEGs and, after all, why should that interest you?
In a previous article, we discussed the never-ending battle of JPEG vs PNG since these are the two most widely used image formats today.
The progressive image format was created as a space-preserving, performance-enhancing alternative to baseline JPEGs.
This progressive version of a standard JPEG displays a blurry preview of the loading image.
Difference Between Standard JPEG and Progressive JPEG
To better understand what sets apart a progressive from a standard (baseline) JPEG, first we need to understand what each of them stands for and when they’re supposed to be used.
Under normal circumstances, an average person sitting at their computer probably won’t spot the difference right away.
You open an image, it loads and you’re good to go. But what happens when the conditions are less than ideal and the internet speeds are very slow? This is where we start to see the main differences between baseline and progressive JPEGs.
A standard or a baseline JPEG is one of the most popular image formats online. Unless you’ve done some previous optimization, it’s highly possible your website is full of them.
This is because JPEG is one of the oldest image formats and most designers have made their basic steps using it.
An interesting fact is that JPEG isn’t actually an image format but rather the name of the image compression algorithm created by the Independent JPEG group.
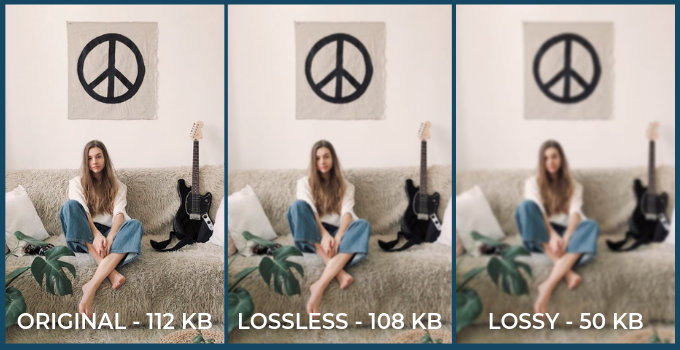
It’s important to note that baseline images are created with lossy image compression. This means that some of the information is lost while encoding resulting in poorer detail of the image.
Still, the unaided human eye can’t see these subtle imperfections and they bring more good than harm since this form of encoding ensures smaller file sizes which is a big plus in website optimization.
There’s a lot more to find out about different image compressions so that’s why you can check out one of our previous posts on this subject – Lossy vs Lossless Image Compression
The easiest way to spot a baseline JPEG is by opening an image with a slightly slower internet connection and watching it as it loads.
A standard JPEG image loads from top to bottom until it reaches 100 %. The specific way in which a classic JPEG image is encoded lets it slowly load the image segment-by-segment thus gradually displaying the wanted content.
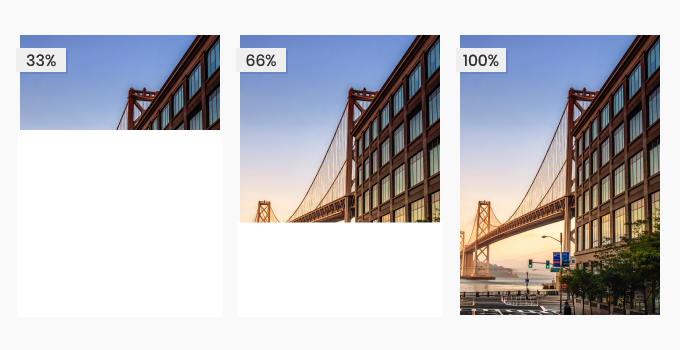
These “segments” or little squares hold the color information needed to load the image precisely in the form of frequencies (Low, Medium and High).
So when you save an image you’re actually saving the “frequency information” in these little squares your image is encoded in over and over until the loading is complete.
The difference in the loading process is one most obvious things that set apart a baseline JPEG from a progressive JPEG.
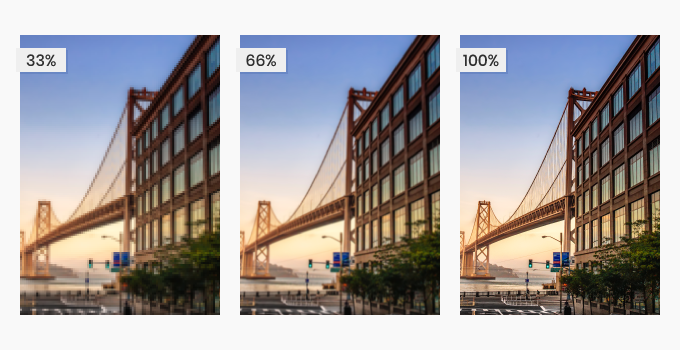
On the other hand, a progressive JPEG image loads information differently by giving the users a rough, blurry preview of the entire image that’s currently processing.
Right from the start, it’s obvious why this is an advantage since it allows the users to see the content instantly, instead of starring at a black screen that’s slowly being populated by the image.
The “preview” is possible because the progressive JPEG is encoded differently and it loads only some of the information to give you a pixelated “sneak peek” of the image you’re trying to load.
So instead of trying to load the whole image at once, a progressive JPEG is encoded to load information in a different order than its baseline sibling.
And while there are many advantages to displaying a placeholder image while the full resolution image finishes loading, there are some users that have a negative view on this “perk”.
One possible disadvantage is that less tech-able users might think, at first glance, that the images on your website are simply “blurry” without knowing this is just the way they load.
This also adds to the general feeling of some users that the website is somewhat less appealing with many pixelated images.
Never the less, we still believe that the progressive JPEG’s ability to display a placeholder image is a plus for most.
In terms of frequencies we talked about before, progressive images first load a portion of the information (low frequencies) in each square (allowing a preview of a pixelated image) then continue to fill the image (with medium and high frequencies) in each consecutive square.
This allows the entire image to be displayed, somewhat blurry but still easily recognizable. The few seconds of delay when displaying an image can mean the difference between staying on your site or finding the one with an image a user can instantly recognize.
Pros & Cons of Progressive JPEGs
So, let’s see where we stand. What are the “yeas and nays” of the progressive JPEG image format?
Pros
- Allows a quick preview by displaying a low resolution placeholder image
- It provides a better user experience since it offers more visual information
- An image saved as a progressive JPEG is usually smaller.
- The optimal solution for use on slow connections like the airplane or train WiFi.
- Optimizes your website to be faster, more user-friendly and engaging
Cons
- Some programs and browsers don’t support this image format
- Higher strain on your CPU while loading images (very important when viewing from phones or tablets)
- Longer loading times on slow connections
- Encoding progressive JPEG images is significantly slower
Find the type of JPEG used on your Website
So, the first step in optimizing your website to work faster and be more efficient is finding out what type of JPEG your web page is saturated with.
The internet offers many options but we’ve found that only a few are fast and simple in showing you what you came for – whether the image you have is a progressive or a baseline JPEG. We’ve analyzed about a dozen different options and while they all do the job, some are more “elegant” than others.
These analysis tools are usually accompanied by a bunch of other performance-related options and if you’re super tech-savvy, then that’s not an issue.
But for the laypeople among us trying to salvage and improve their websites, this can be over-encumbering and can divert from their primary purpose and that’s the basic function of telling you what type of JPEG populates your website – progressive or baseline?
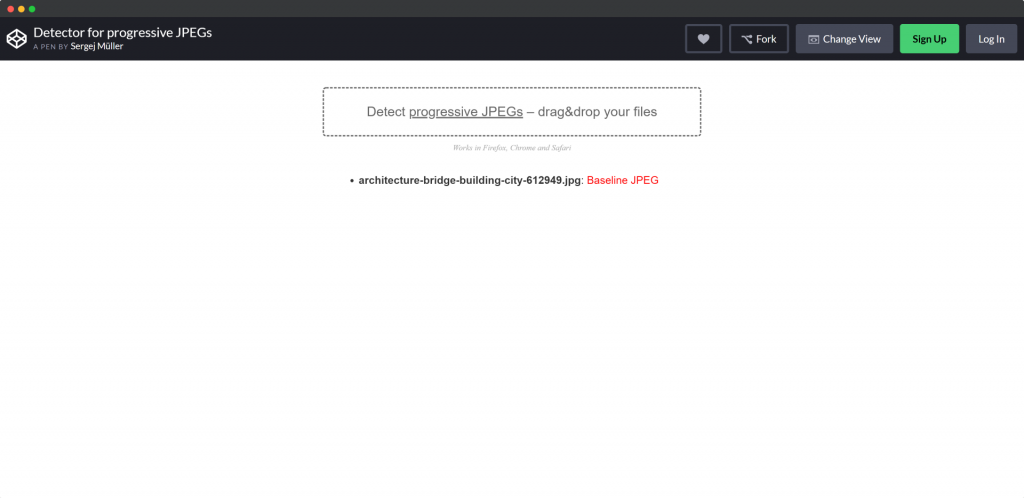
First things first, if you’re still in the process of creating a website and want to upload only progressive images, then this next tool will prove super useful since it’s really simple and it shows you the results of the image analysis instantly and in a simple YES or NO.
Detector for progressive JPEGs does what its name says, tells you if the image you uploaded is a progressive or a baseline JPEG.
The tool itself is pretty basic and therefore simple to use for users who have a small number of pictures to analyze. It works with Firefox, Chrome and Safari browsers.
A more in-depth, all-in-one tool is the Web Page Test. This handy online webpage analyzer can easily tell you if you have progressive JPEG images on your website or not.
While it serves this purpose well, it’s much more than a simple analyzing tool and for the more knowledgeable is a trove of useful results that can help you better optimize your website for superior performance.
How to convert JPEG to Progressive JPEG
The easiest way to create progressive JPEG images for your website is by converting them from a baseline JPEG format. And while it may sound intimidating, we promise it’s not. The internet offers great free options and here are a few we’ve chosen for you.
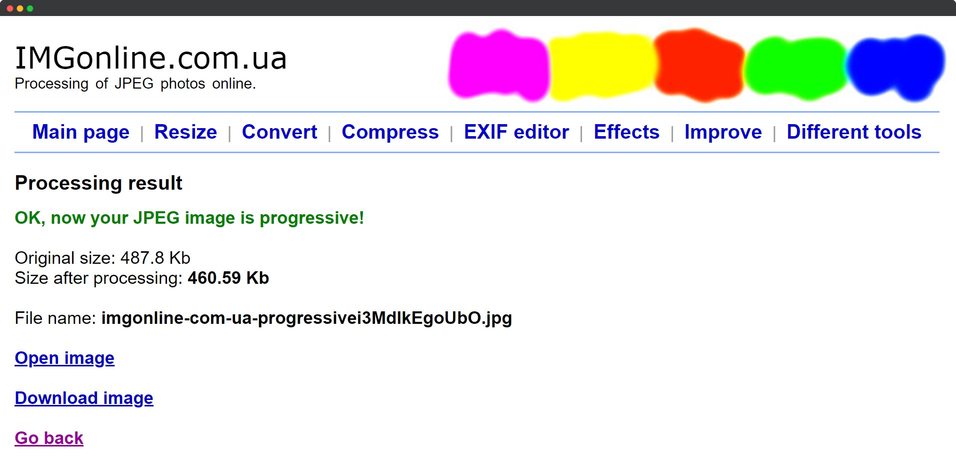
One of the simplest tools we’ve come across is the IMGonline which lets you upload an image while choosing to copy the EFIX/metadata or not. Once the upload and the conversion are done, you get an overview of the size before and after processing.
Since the first image we uploaded was rather small, the compression, in this case, was minimal, but with larger files it became noticeable. The larger image also took a few seconds more to convert.
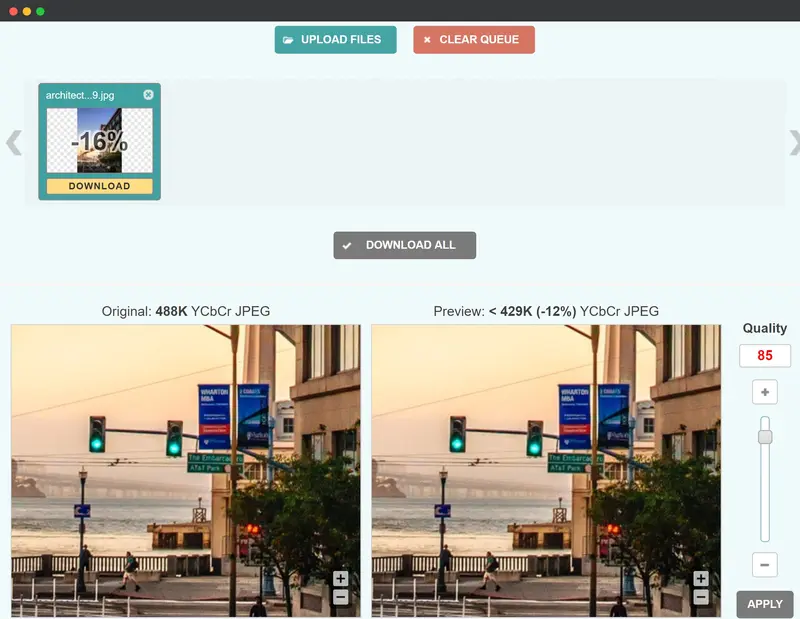
Another useful tool for converting baseline to progressive images is the Optimizilla online image optimizer. This tool is extremely useful if you’re looking to shrink the size of your image without the quality deteriorating.
It’s handy because once you upload images (you can upload in a bulk), the tool gives you a preview of the adjustable compression level. The higher the level, the lower the quality of the resulting image.
Improve Website Speed with Progressive JPEG Images
You used the tools we mentioned above? Congrats, this very likely means you have a smooth-running, well-optimized website.
Or you’ve just had a lot of fun analyzing photos from last Christmas. Either way, it’s a proven fact that progressive JPEGs do indeed improve website speed by simply being, well, more effective.
Progressive images might not be faster to load but are often smaller than regular, baseline JPEGs and thus improve the overall speed of your website.
While this might not mean much for one or two pictures on your webpage, when you analyze hundreds and realize they all take up a certain amount of extra space then you start to realize how much faster your website would be if you just changed from baseline to progressive.
Aside from progressive JPEGs being smaller, they offer a big perk – they load a blurry, full image preview, giving the user a visual sneak-peek of the image they’re looking at. As discussed before, this is a great advantage since most people are in a rush and prefer to know what they’re viewing sooner, rather than later.
Conclusion
Progressive JPEGs are a great way to optimize your website to be fast, efficient and user-friendly. The entire image is created in the form of a blurry preview that gets clearer as it loads.
And while this isn’t an issue on most medium to fast internet connections today, it comes in super handy on the slow and sluggish airline WiFi while you’re trying to pass the time by looking at your favorite memes.
Alas, there are downsides and while you will be able to enjoy your favorite content with an instant preview, it will “eat up” your battery faster since progressive JPEGs put more strain on your CPU. This is especially important to consider if most users are going to be visiting your website from their phones or tablets.
Simply put, the progressive image format gives your website an extra edge by giving the user more to look at and thus keeping them busy and on your webpage.
If you’re looking to make your web presence more engaging and user-friendly, converting baseline JPEGs to Progressive JPEGs is the way to go.
Can I use Progressive JPEG?
Yes! Anyone can use progressive JPEGs on their website. We’ve provided tools you can use to analyze the images on your webpage and convert them to progressive JPEGs. It’s up to you to decide whether it’s your cup of tea.
What is progressive image loading?
Progressive image loading is a smart technique that displays a low-res, blurry placeholder picture until the original image has loaded. This is particularly handy because it gives the user a pixelated display of the image they are trying to view.

